Debian 13 Trixie with OverlayRoot on an M1 MacBook (Dual Boot)

Its about time I started traveling again, and I came to the realization that I am probably going to need a portable linux machine. Whilst I do use UTM, its not really ideal for some tasks which are better suited for a bare-metal experience.
I know that I can put my UTM images on my external SSD, but doing this seems to be slow and comes with some issues.
I had toyed with an Asahi linux installation in the past, and had set aside 100GB of my 512GB SSD for this, but ended up having to remove it due to the space on my meagre inbuilt SSD starting to quickly fill up. Besides, I'm more of a Debian guy if I'm honest. Having a read, I found out about the Debian Bananas project, which essentially modifies the Asashi installer to install Debian instead.
I didn't want to have to delete tons of files from my Mac in order to clear a big chunk of space for Linux again, so this time I kept back 97% of the disk space for MacOS, leaving approx 15GB for the linux installation. This meant that I would only be able to install the "server" version of Debian, but I had a plan!
OverlayRoot to the rescue
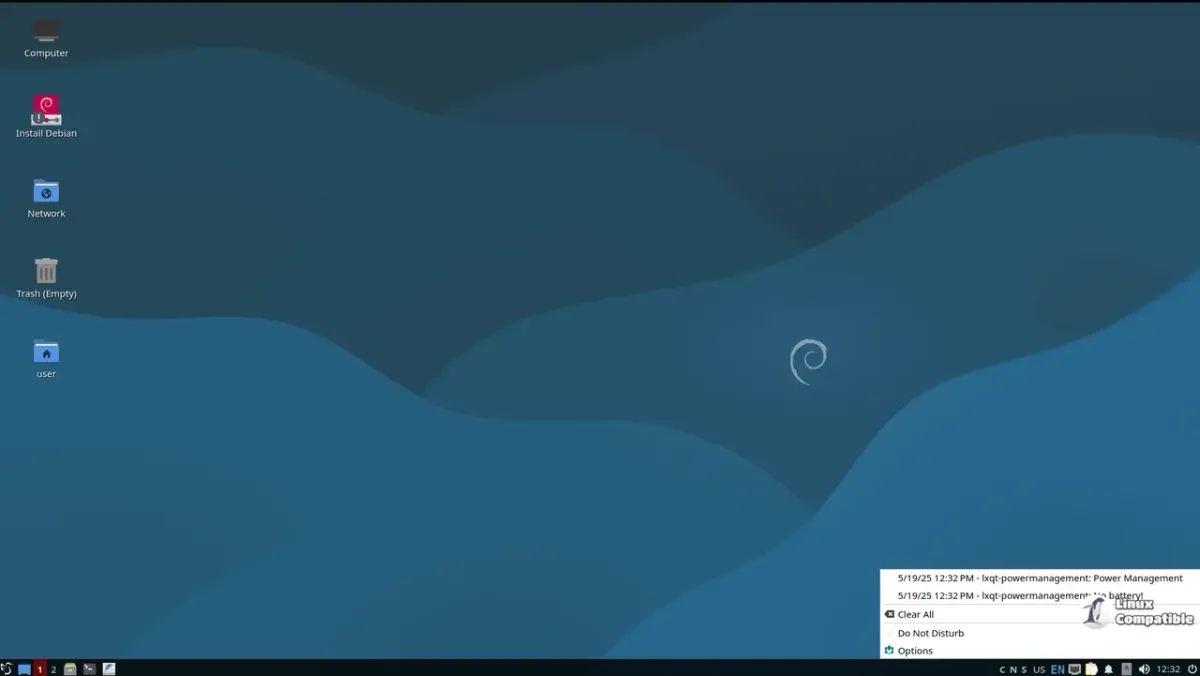
OverlayRoot / overlayfs is a means to combine two filesystems, such that a new filesystem is created from the both, where changes are written to the "external" media, and the original media is set to read-only. This means that despite having had only 15GB for the initial linux install, I was able to create a 200GB partition on the external SSD, allowing me to install the full suite of software I wanted to use including various desktop environments etc.
The base install includes some useful things, including an LXDE environment, a browser, and various network and admin tools, and is bootable even if the external SSD is not connected, in this case, the overlay is RAM based, and disappears after a reboot unless files are manually saved somewhere.
Issues I had
The main issue I had was that initially, when trying to attach the overlay volume at boot time (it is mounted during the initrd stage) due to it being a USB drive, it hadn't quite initialized before the initrd started to look for it. To get it to recognize my partition on the SSD, I had to add a delay parameter to the kernel command line, a 5 second delay was sufficient.
There are several reports by people online saying that overlayroot is no longer working in Debian, mostly from people trying to run it on the Raspberry Pi platform, I suspect they are probably experiencing the same issue as I was. Fortunately adding the delay to the kernel command line makes for an easy fix.
The other issue I had was that for some reason, the hardware drivers for the Mac were not accessible from the underlying filesystem when booted in Overlay mode, the solution was to simply copy the files from the RO part of the FS to the RW overlay part, then reboot. After doing this, everything works perfectly.
The result
I now have a machine that is fully capable of running both MacOS and Linux based apps natively, which is great for my work as a developer. I can even use LUKS volumes under linux so I can keep anything that needs to stay confidential in a safe space.
I plan to update this article with images and more concise instructions when time allows me to do so.
Jamie